Friday, October 24, 2014

Using Cordova/PhoneGap with Xamarin Android

    Since I haven't found a lot of informations on this matter searching with Google I've decided to share my solution and, maybe, save some time for some of you. The target of this post is to get the Cordova / Phonegap running inside an Xamarin Android project on an Android device.

    In order to use Cordova inside an Xamarin project you would first need to build the Cordova framework.  What I did was to clone the repository Cordova Android and then follow the Building without the Tooling instructions.

      Once you have the cordova*.jar we can start binding the library using Xamarin. Do to that you will have to create a new Project using Xamarin Studio (this does not work in Visual Studio) and select the Android Java Bindings project type:


       The structure of the project is pretty simple. Add the Jar to the Jars folder and ensure the Build action is set to EmbeddedJar and try to build the project.


  You will get some errors compiling but luckily these errors are on components we don't need to bind to. So what you have to to is to edit the Metadata.xml file inside the Transforms folder and add the these two internal packages that we want to ignore:

Doing that will enable to correctly build the binding project.

    Now that we have the binding we can test it. For this I have build a test Project and copied the test www container from the github repository.  It took some while to make it work but everything seems to run as expected. I didn't have time to implement all the activities from the sample but only some of them. It should be pretty easy to port also the others if needed. This sample also uses a custom plugin that launches activities when the button on the main screen get pressed so you should basically have all that you need to start using Cordova with Xamarin. When you launch the project you should see this screen on your device/emulator:


These are the items implemented in the Test project: Backgroundcolor, Basic Authentification, Full Screen, HTML not found, Iframe Lifecycle, Menus & Splashscreen

Here is the link to my Github repository that contains the Binding project and the Test project. This sample is using Cordova 3.7.0


Contact me if you need help

P.S. Still preparing the 3rd post on BLE and it will be the most interesting one as it will be on running in the background.

NAMASTE!


Sunday, June 22, 2014

BLE for developers in Windows 8.1 Part II

      I am sorry that it took me a while to get the second part ready, but better late than ever.
     This second part will be actually about discovering services and characteristics using the new API's available in Windows Phone 8.1 release. As you probably remember this was not possible using the Windows 8.1 BLE API as it is not directly exposed for the store applications. The good news is that things started to move in the right direction with Windows Phone 8.1: possibility to query the services and the characteristics available in a device, support for background tasks and triggers for Bluetooth events, possibility to open the Bluetooth pairing window from inside of our applications (this feature was already available in Windows Phone 8.0 and, luckily, it is still there in 8.1) . There are still some missing features like: 
  • no support real beacon scenario as the user have to manually pair the BLE device before it is accessible to the application
  • no support for server mode. Windows Phone 8.1 supports only client mode
     Hopefully we will see better API in the next release of Windows and at some point the two API's will aliogn. In this moment Windows Phone has better support for BLE devices than it's bigger brother.
     To better illustrate the new API I have created and published an Windows Phone XAML application that is already available in the Store and I've uploaded the source code on Github.
     In order to be able to develop/test for BLE devices you will need and LE device (see the devices from my previous post and since then my collection just got bigger as I've got an Polar H7 heart rate monitor, and the Nokia Treasure Tag) and you will need an Windows Phone 8.1 device that supports the new LE stack. Regarding the device there are good news and a bad news. The good news is that all the Windows Phone 8 devices have hardware that support LE and will support the feature once they will receive the official update. The bad news is that with the Developer Preview this feature is not supported (on the Nokia devices there is an stack conflict between the GDR3 Nokia LE driver and the Microsoft one, Samsung Ativ S it needs a firmware upgrade, and maybe, from what I've heard, it works on the HTC 8x devices but I don't have one and I cannot confirm). So if you have an Windows Phone 8 device you will need to wait for the official release. On the other hand if you have a new Windows Phone 8.1 device like the Lumia 930 or 630 these feature is already supported along with all the other cool features available in the new release . The Lumia 630 and 930 are awesome as they have support for 
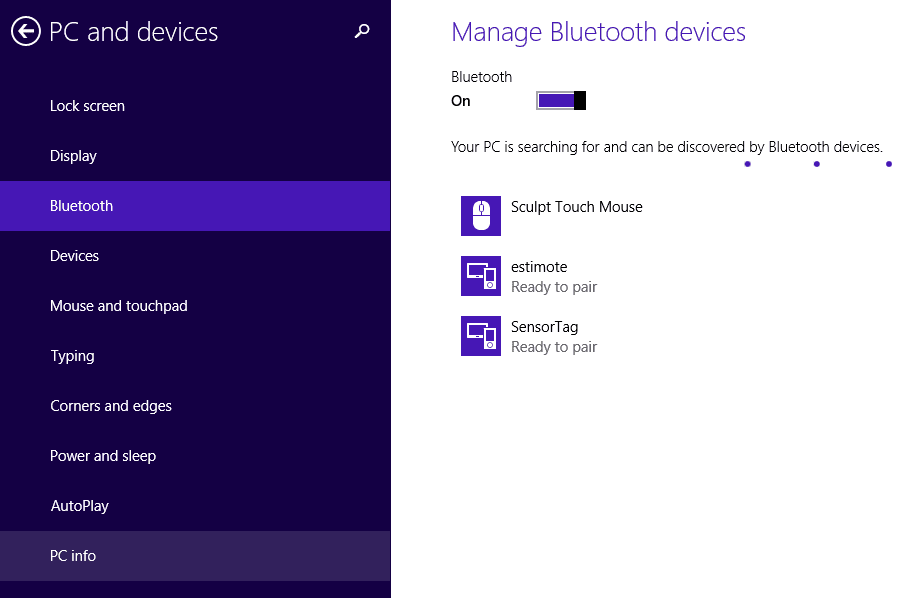
Nokia Sensor Core a technology similar to the one present in the iPhone 5S. The easiest way to see if your device supports LE is to buy an LE device, open the system Bluetooth pairing window and see if you are able to see the device in the list of devices you can pair with.
     In this post I will use the Nokia Treasure Tag. Our goal is to find out as much as we can about the services and characteristics exposed by this device. We will use the new Windows Phone XAML projects available in Visual Studio 2013 Update 2.
     Just like Windows 8 in order to be able to list LE devices from inside of our application we will have to specify in the Package.appxmanifest the type of Device we would like to connect to. As we don't know the services a priory we would choose the a generic service that is implemented in most of the devices and, from my tests, I think Generic Access is a good choice. The lines we will have to manually add inside the Package.appxmanifest are:
 
 <Capabilities>  
   <Capability Name="internetClientServer" />  
   <m2:DeviceCapability Name="bluetooth.genericAttributeProfile">  
    <m2:Device Id="any">  
     <m2:Function Type="name:genericAccess" />  
    </m2:Device>  
   </m2:DeviceCapability>  
  </Capabilities>  

   Then just like in Windows 8.1 we can enumerate the paired devices using DeviceInformation.FindAllAsync and use the predefined GenericAccess UUID:

  bleDevices = await Windows.Devices.Enumeration.DeviceInformation.FindAllAsync(GattDeviceService.GetDeviceSelectorFromUuid(GattServiceUuids.GenericAccess));  

     The output of this method is a DeviceInformationCollection of paired devices that expose the Generic Access service.
     If no devices were found that exposes this service it means that no device was paired with our phone or the Bluetooth is disabled on the device. In this case we can easily open the Bluetooth settings window:
 Windows.System.Launcher.LaunchUriAsync(new Uri("ms-settings-bluetooth:", UriKind.RelativeOrAbsolute));  
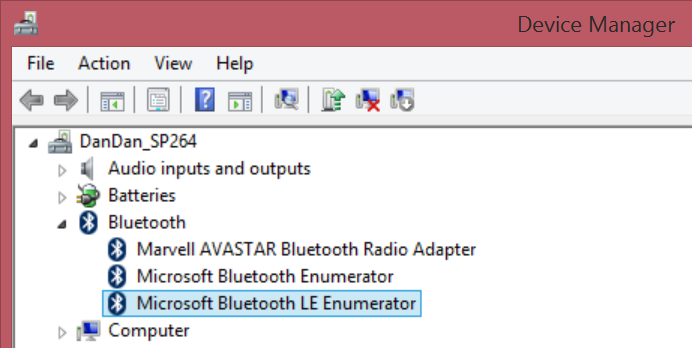
     Once we have the devices we can select one of them and create a new instance of the newly added class in Windows Phone 8.1 SDK BluetoothLEDevice. This class can be usedto enumerate all the services available on the device. If you look at the description of the class you will see that it is only supported on Windows Phone (no support for Windows Store applications). We will use the Id property available inside the DeviceInformation to instantiate the class.
  BluetoothLEDevice _device = await BluetoothLEDevice.FromIdAsync(((DeviceInformation)e.Parameter).Id);  
     The BluetoothLEDevice exposes a property called GatServices of type IReadOnlyList<GattDeviceService>  that will give us the list of all the services available on the device. GetDeviceService is a class that is already implemented in Windows 8.1 but it was extended on Windows Phone 8.1. To get a friendly name of the device service (not only the Guid) you could use reflection, but I have created a helper class BLEHelper.cs (see the github project) that can be easily extended to cover more known services. Remember that all the LE services that have an id that start with 000018 and end with -0000-1000-8000-00805f9b34fb are probably standard LE services and you can find further details about them here.

     Once we've identified the service we are interested in (we have an instance of the class) we will use the newly added method GetAllCharacteristics() (another method available only for Windows Phone) to get the list of all the characteristics the services exposes and for each characteristic we can get its properties, values, type,....

     Each characteristic have an unique id and, int his case, for mapping the Guid to a known name on the UI I have created a simple converter that uses reflection to search and map the Guid to a GattCharacteristicUuids name:

 public class CharacteristicName : DependencyObject, IValueConverter  
   {  
     public object Convert(object value, Type targetType, object parameter, string language)  
     {  
       if (value != null && (value.GetType() == typeof(GattCharacteristic)))  
       {  
         var c = (GattCharacteristic)value;  
         if (c.UserDescription != "")  
           return c.UserDescription;  
         foreach (var prop in typeof(GattCharacteristicUuids).GetRuntimeProperties())  
         {  
           object v = prop.GetValue(null);  
           if (v != null && v.GetType() == typeof(Guid) && ((Guid)v) == c.Uuid)  
             return prop.Name;  
         }  
       }  
       return "Unknown";  
     }  
     public object ConvertBack(object value, Type targetType, object parameter, string language)  
     {  
       throw new NotImplementedException();  
     }  
   }  

     If you download the BLEExplorer app you can also use share to export all  the data (services+characteristics) to any application that support text sharing (like email).
     In the next post I will explain how to create background tasks that subscribe notifications from an BLE device, manage connection lost and reconnect in the backgroun.

P.S. If you have questions please do contact me by email and I will be glad to help. I have disabled the comments on the blog because there was a huge amount of Spam.

NAMASTE!


Sunday, February 16, 2014

BLE for developers in Windows 8.1 Part I

    For who doesn't know Bluetooth Smart/Low Energy devices are devices optimized for low power consumption. Devices can act as an GATT Server, GATT client or both at the same time. In Server mode the device exposes one or more services. Each service has one or more characteristics with properties attached to it (read, write, notify, broadcast,...). The GATT Client connects to the Server and "consumes" its services.

   Windows 8.1 has added support for communicating with Bluetooth devices from the store applications. This opened the development for a lot of accessories including the Bluetooth Low Energy devices. Windows 8.1 supports only GATT client mode. This is the first iteration of the Bluetooth api and, from some points of view, it is not complete and kinda rushed out to be available. Here are some missing features:

  1. The User eXperience when connecting to an Bluetooth device is bad. The common scenario for this kind of device is that you buy the device you see the application for the Windows Store is available, download it and run the app to play with the device. Here comes the "fun" part: form inside the store application you cannot connect to devices that were not previously paired from PC Settings - Devices - Bluetooth. So, for the first connection, when the user launches the application and you don't find any device to connect to, you will have to find a way to explain and convince the user to open Settings ->Change PC Settings->.... Bluetooth and then come back to your application. Also it is not possible to launch the  Bluetooth screen directly like in Windows Phone case.
  2. For the BLE devices the whole idea of the application is to consume less but have a connection between the device (server) and the application (client). Too bad that is there is no to make teh application run in the background or receive notifications from the devices when the application is suspended. This missing feature "kills" a little bit the BLE principles and without it the protocol from the app side is not better than the classical SPP. The application should be able to connect, receive notifications in the background, be aware when the device disconnects and to be able to reconnect when available again.
  3. Without being able to connect to devices that were not previously paired beacon scenarios are not possible.
  4. Missing api's to discover the services and the characteristics of each service for any BLE device. 
     Beside that let's have a first look at how the new apis work. I have bought several BLE devices: The Texas Instruments CC2541 SensorTAG, Estimote tag,  Kensington Proximo TAG. (I actually bought the devices in inverse order: Kensington, Estimote TI ).
       If you want to start testing/demo the BLE api I think the SensorTAG  is the best choice. The Texas Instruments chipset CC2540/1 is one of the most used chipset in BLE devices and the price of this kit is around 25$. It includes 6 sensors inside: IR temperature Sensor, Humidity Sensor, Pressure Sensor, Accelerometer, Gyroscope, Magnetometer so you can simulate various scenarios.
     The first step would be to understand if your system supports BLE devices. For this you will have to open Device Manager-> Bluetooth and see if the "Microsoft Bluetooth LE Enumerator" is present. If it is your system can connect to Bluetooth Smart devices. 


  The second step would be to pair with the device (actually you could skip the first step and if you don't see your device in the list see if your system supports BLE). To make the device visible for pairing just push the button on the left side of the device.


    If the device you are looking for is present pair with it (used 0000 as pin). The system configures all the GATT services internally.  Here is how your windows Bluetooth devices look internally before and after the pair:


    You can actually see that we have new GATT services added to our system.

    When using the GATT api you will actually have to know the service you want to connect to and also the characteristics that the service exposes. There are several ways to do that:

  1. The most obvious one you have the documentation of the device and see all the services and their characteristics. Here is the pdf of the TI Development KIT
  2. You can actually get the Service UUID's from the Device Manager:


and then you could hope it is one of the standard BLE profiles so you could have the characteristics for that service. In the picture above the UUID of the GATT service is f000aa40-0451-4000-b000-000000000000 and it doesn't fit any standard profile. The standard profiles fit this pattern: 0000XXXX-0000-1000-8000-00805f9b34fb where XXXX is the id of the profile (for example 0x1800 is the generic access profile). There are some GATT Services that are not showed in the Device List even if present and, as far as I tested,  these are the Generic Access 0x1800 and  Generic Attribute 0x1801 and Device Information 0x180A. You can  always try to add these services to the list of services you want to connect to as it will enable you to have more information on the device you are connecting to.

    So here is the list of the GATT services exposed by the SensorTAG:
Custom:
Thermometer "f000aa00-0451-4000-b000-000000000000"
Accelerometer "f000aa10-0451-4000-b000-000000000000"
Humidity "f000aa20-0451-4000-b000-000000000000"
Magnetometer "f000aa30-0451-4000-b000-000000000000"
Barometer "f000aa40-0451-4000-b000-000000000000"
Gyroscope "f000aa50-0451-4000-b000-000000000000"
Standard:
Key Service "0000ffe0-0000-1000-8000-00805f9b34fb"
+ standard and hidden in device manager:
Generic Access: 00001800-0000-1000-8000-00805f9b34fb
Generic Attribute: 00001801-0000-1000-8000-00805f9b34fb
Device Information: 0000180A-0000-1000-8000-00805f9b34fb

     Now that we know what services our device exposes we can start creating the Store Application and add the necessary capabilities which will enable us to connect to the device. Start Visual Studio and create an Windows Store application then edit the Package.appxmanifest file using View Code option. Add the following capabilities:

 <Capabilities>  
   <Capability Name="internetClient" />  
   <m2:DeviceCapability Name="bluetooth.genericAttributeProfile">  
    <m2:Device Id="any">  
     <m2:Function Type="serviceId:f000aa00-0451-4000-b000-000000000000"/>  
     <m2:Function Type="serviceId:F000AA10-0451-4000-B000-000000000000"/>  
     <m2:Function Type="serviceId:F000AA20-0451-4000-B000-000000000000"/>  
     <m2:Function Type="serviceId:F000AA30-0451-4000-B000-000000000000"/>  
     <m2:Function Type="serviceId:F000AA40-0451-4000-B000-000000000000"/>  
     <m2:Function Type="serviceId:F000AA50-0451-4000-B000-000000000000"/>  
     <m2:Function Type="serviceId:0000ffe0-0000-1000-8000-00805f9b34fb"/>  
     <m2:Function Type="serviceId:00001800-0000-1000-8000-00805f9b34fb"/>  
     <m2:Function Type="serviceId:00001801-0000-1000-8000-00805f9b34fb"/>  
     <m2:Function Type="serviceId:0000180A-0000-1000-8000-00805f9b34fb"/>  
    </m2:Device>  
   </m2:DeviceCapability>  
  </Capabilities>  

  When interacting with the device you will have to find the devices that expose the services we want to connect to and then connect to the desired service. For this we will call Enumeration.DeviceInformation.FindAllAsync passing an AQS string to filter the devices. Let's say we want to connect to the devices that expose the Generic Access Service as it is an standard service. We can actually generate the AQS in 3 different ways for this service:

  1. Using the the standard implemented GattServiceUuids GetDeviceSelectorFromUuid(GattServiceUuids.GenericAccess)
  2. Generating an standard UUID from an shortID GetDeviceSelectorFromShortId(0x1800) -what it actually does is to add  "-0000-1000-8000-00805f9b34fb" to the id
  3. When the service is not a standard one you will have to use GetDeviceSelectorFromUuid(new Guid(serviceGuid)) and pass the custom service guid in our case serviceGuid="00001800-0000-1000-8000-00805f9b34fb"
   The code below shows how to read the device name using the Generic Access Service of the Sensor Tag. Here are the standard characteristics of the generic access service link.

       //Find the devices that expose the service  
       var devices = await Windows.Devices.Enumeration.DeviceInformation.FindAllAsync(GattDeviceService.GetDeviceSelectorFromUuid(GattServiceUuids.GenericAccess));  
       if (devices.Count==0)  
         return;  
       //Connect to the service  
       var service = await GattDeviceService.FromIdAsync(devices[0].Id);  
       if (service == null)  
         return;  
       //Obtain the characteristic we want to interact with  
       var characteristic = service.GetCharacteristics(GattCharacteristic.ConvertShortIdToUuid(0x2A00))[0];  
       //Read the value  
       var deviceNameBytes=(await characteristic.ReadValueAsync()).Value.ToArray();  
       //Convert to string  
       var deviceName=Encoding.UTF8.GetString(deviceNameBytes,0,deviceNameBytes.Length);  

   Now let's see how to interact with an non standard service and a characteristic that notifies when changing. I've chosen the accelerometer service of the SensorTAG:

       //Find the devices that expose the service  
       var devices = await Windows.Devices.Enumeration.DeviceInformation.FindAllAsync(GattDeviceService.GetDeviceSelectorFromUuid(new Guid("F000AA10-0451-4000-B000-000000000000")));  
       if (devices.Count==0)  
         return;  
       //Connect to the service  
       var accService = await GattDeviceService.FromIdAsync(devices[0].Id);  
       if (accService == null)  
         return;  
       //Get the accelerometer data characteristic  
       var accData = accService.GetCharacteristics(new Guid("F000AA11-0451-4000-B000-000000000000"))[0];  
       //Subcribe value changed  
       accData.ValueChanged += accData_ValueChanged;  
       //Set configuration to notify  
       await accData.WriteClientCharacteristicConfigurationDescriptorAsync(GattClientCharacteristicConfigurationDescriptorValue.Notify);  
       //Get the accelerometer configuration characteristic  
       var accConfig = accService.GetCharacteristics(new Guid("F000AA12-0451-4000-B000-000000000000"))[0];  
       //Write 1 to start accelerometer sensor  
       await accConfig.WriteValueAsync((new byte[]{1}).AsBuffer());  

In this case we connect to the service, we subscribe to the data characteristic notifications (we also ensure that the characteristic is in notify mode), and then we start the accelerometer sensor. Once the sensor starts it will notify us every 1000 ms. (default value that can be changed).

 async void accData_ValueChanged(GattCharacteristic sender, GattValueChangedEventArgs args)  
     {  
       var values = (await sender.ReadValueAsync()).Value.ToArray();  
       var x = values[0];  
       var y = values[1];  
       var z = values[2];  
     }  

We can do the same with all the other services exposed by the device.

Till next post NAMASTE!


Thursday, January 2, 2014

I am an MVP Rookie

   I am so excited so, even if I am really tired after more than 30 hours travel and just 1 hour of sleep, I have to write this small post and share my achievement with everyone. Today Microsoft awarded me my first MVP award in the Client Development category. I am really honored and can only improve in 2014. I would also like to thank all members of the Italian communities that gave me the opportunity to speak at events and included me in this wonderful world. Hope I am not missing anyone and the order is random: Roberto Freato, Lorenzo Barbieri, Matteo Pagani, DotNetLombardia, Alessandro Scardova, Massimo Bonanni,  Daniele Bochicchio, Daniele Pagani for the Nokia events, Marco dal Pino and everyone else I am not remembering (sorry but I am really tired).
   Wish everyone a GREAT 2014 !